· 7 min read
Hosting websites using IIS
Internet Information Services (IIS) is a flexible, general-purpose web server from Microsoft that exclusively runs on Windows systems.
Introduction
In our previous articles, we were tinkering with all Docker stuff and running ASP.NET apps using docker. Docker is actually a great tool to run your applications in a containerized environment. But, what if you don’t need all the bells and whistles of Docker and just want to host your application in a simple way? More specifically on little bit-older servers where Docker isn’t supported or if you don’t have enough resources to run docker? Well, you can fallback to using traditional web servers to host your application.
There are many web servers available in the market and the most popular ones include Apache, Nginx, IIS, etc. When it comes to Windows, IIS is quite popular and it is the default web server that comes with Windows. Internet Information Services (IIS) is a flexible, general-purpose web server from Microsoft that exclusively runs on Windows systems. While most people prefer Nginx or Apache for hosting their applications, I personally prefer IIS as I find it easy to use and configure. In this article, we will see how to host websites using IIS Express on your local machine.
Game plan
We are going to host a simple HTML page as a website using IIS.
Prerequisites
- Windows machine for obvious reasons as IIS is exclusive to Windows
- Setting up IIS on your machine
Currently, I am going to walk you through the steps to host the applications on your local machine. But, you can also host the applications on a remote server. The steps are pretty much the same. My machine is running Windows 10 and we will be using IIS Express to host the applications. The Steps to enable IIS in Windows Server edition is quite different from consumer editions and I am not going to cover that here.
Enabling IIS Express
Usually IIS is not enabled by default on your machine. You need to enable it manually. To do that, follow the below steps:
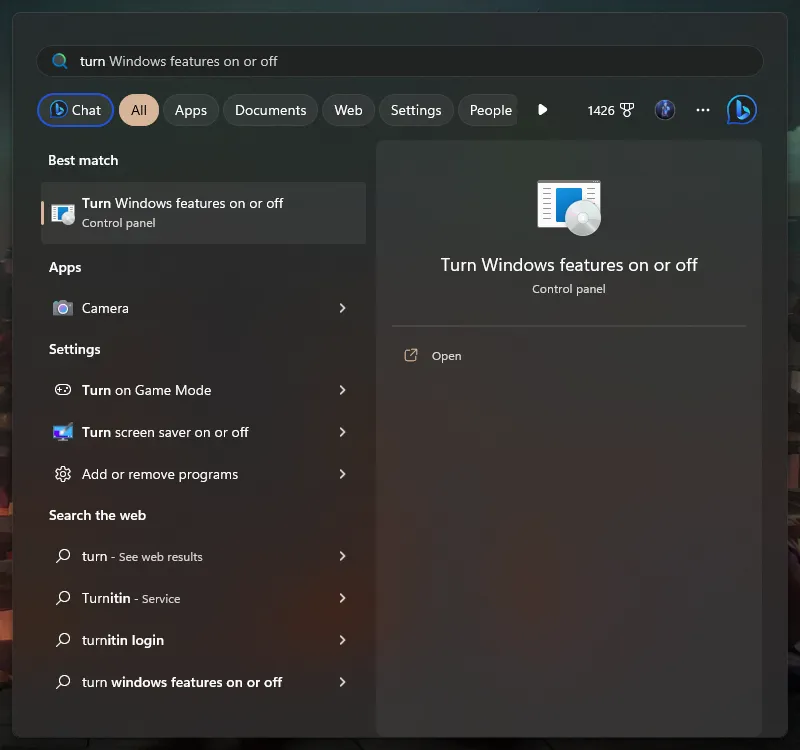
- Open Start menu and search for “Turn Windows features on or off”
- Enable the checkbox next to “Internet Information Services”
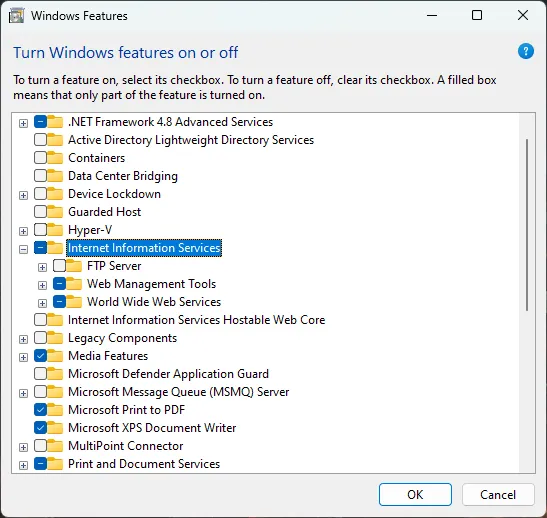
Click OK and wait for the installation to complete. Sometimes, you might need to restart your machine for the changes to take effect.
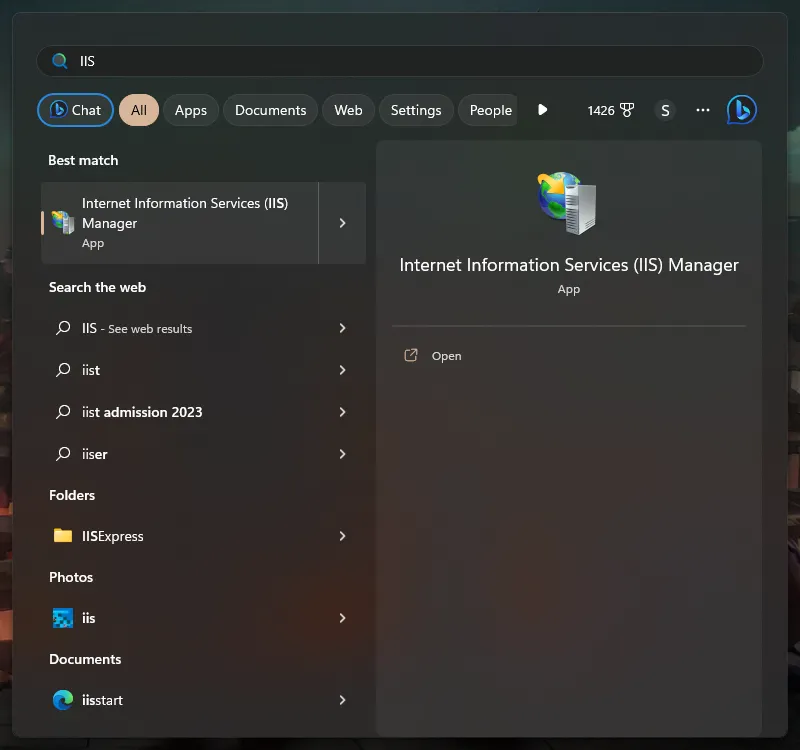
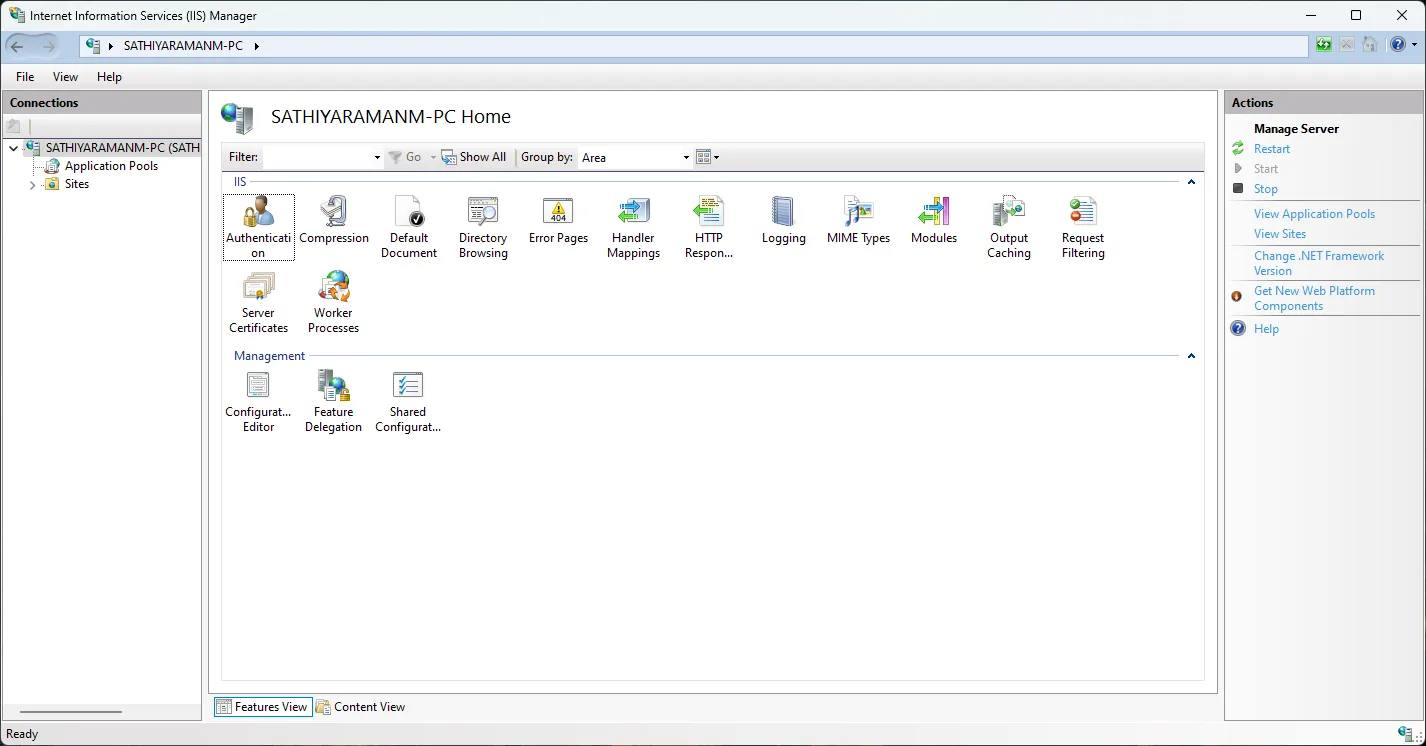
Open Start menu and search for “Internet Information Services (IIS) Manager”
- Click on the “IIS Manager” to open it
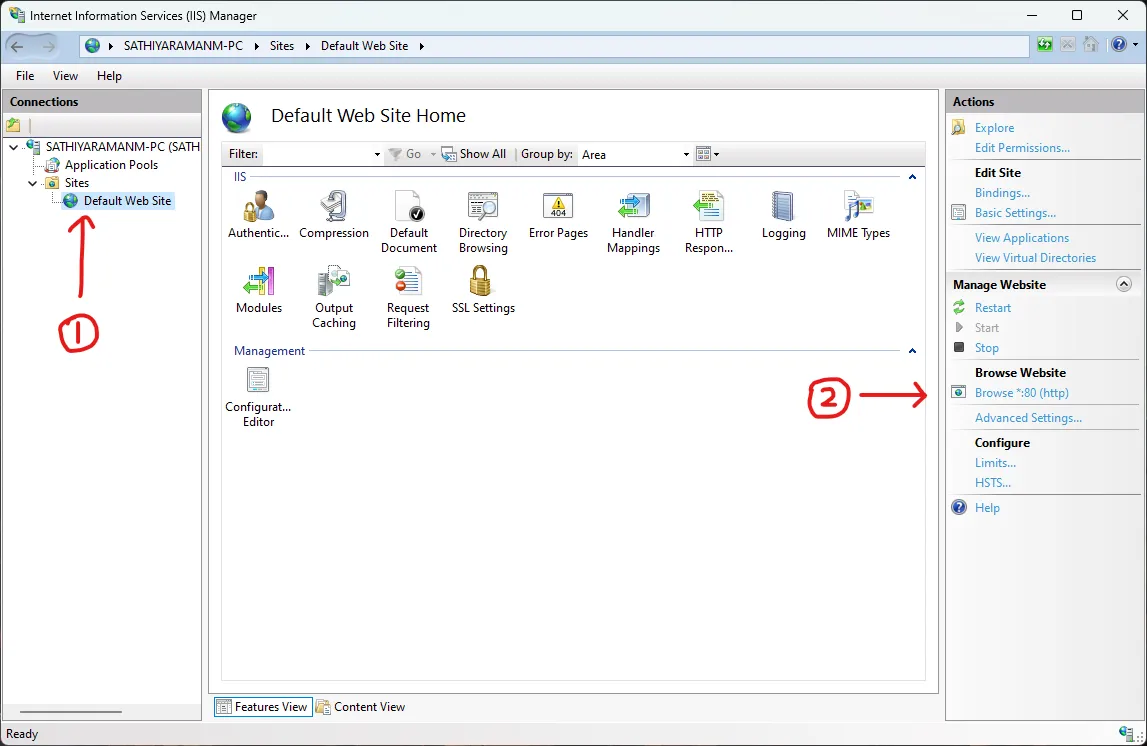
- On the left side, you will see the “Connections” pane. Expand the “Sites” node and you will see the default website. On the right side, you will see the actions pane. Click on “Browse *:80 (http)” link to open the default website in your browser.
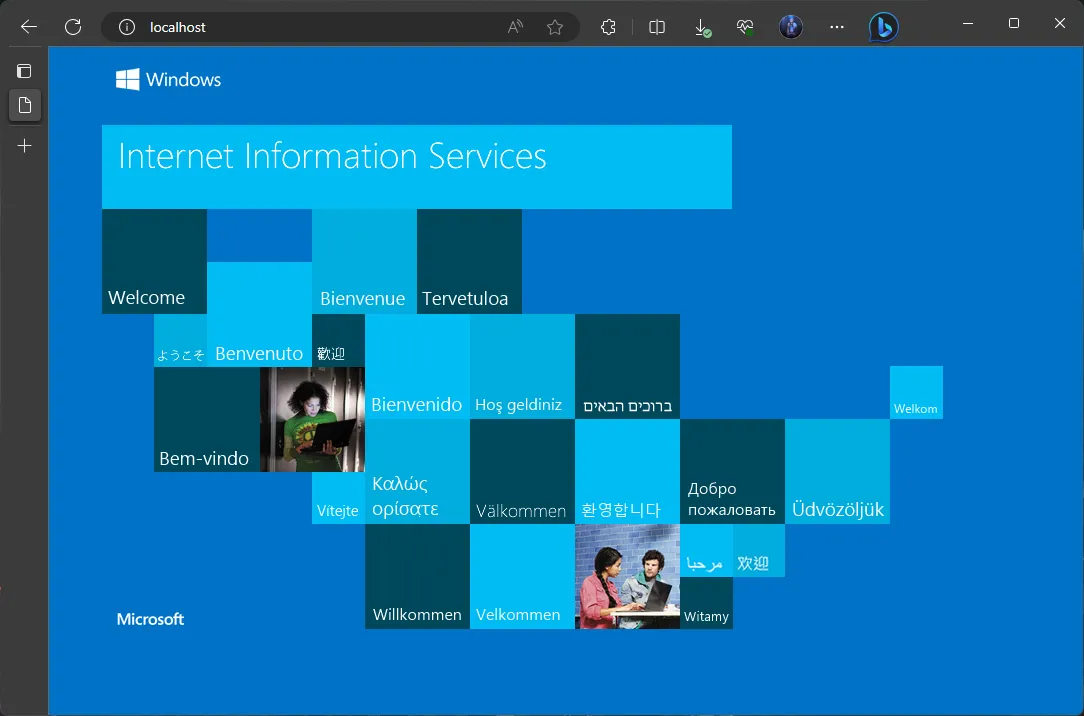
- You will see the default IIS page in your browser
Hosting a simple HTML page
Now that we have IIS enabled and running, let’s host a simple HTML page. To do that, follow the below steps:
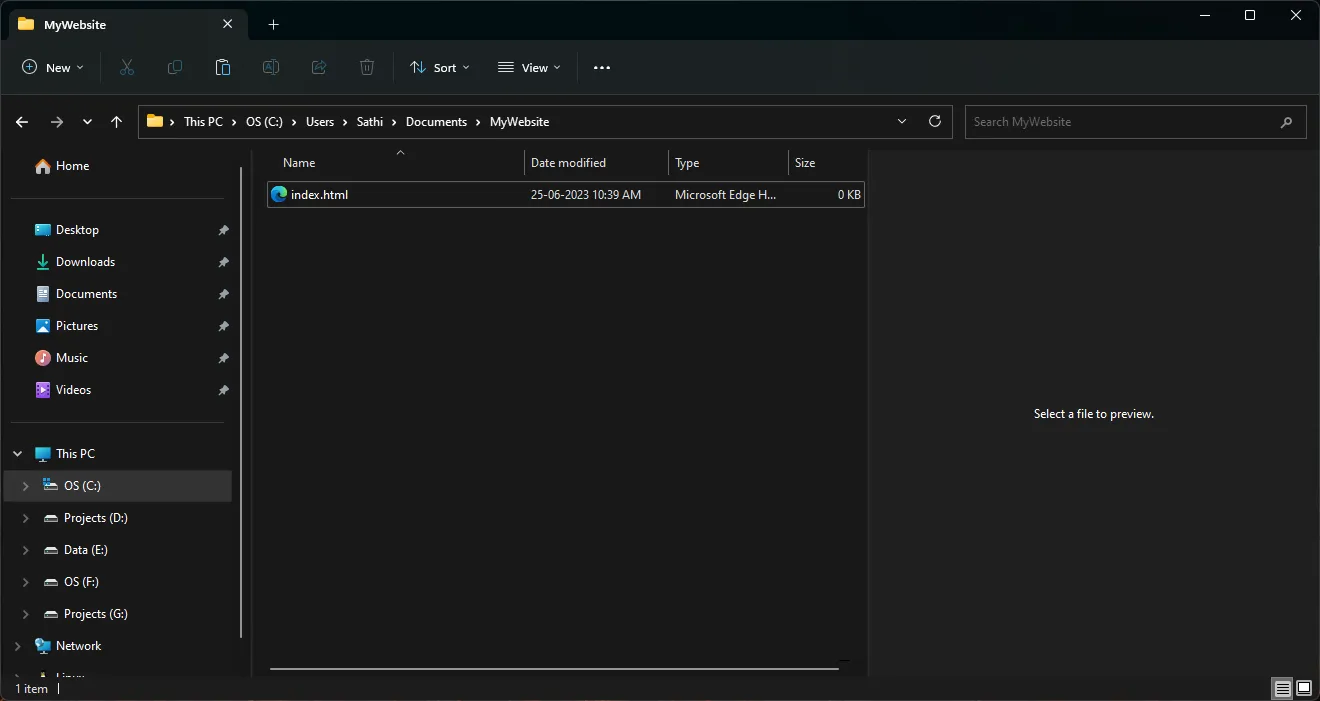
- Create a folder named “MyWebsite” in your “Documents” folder
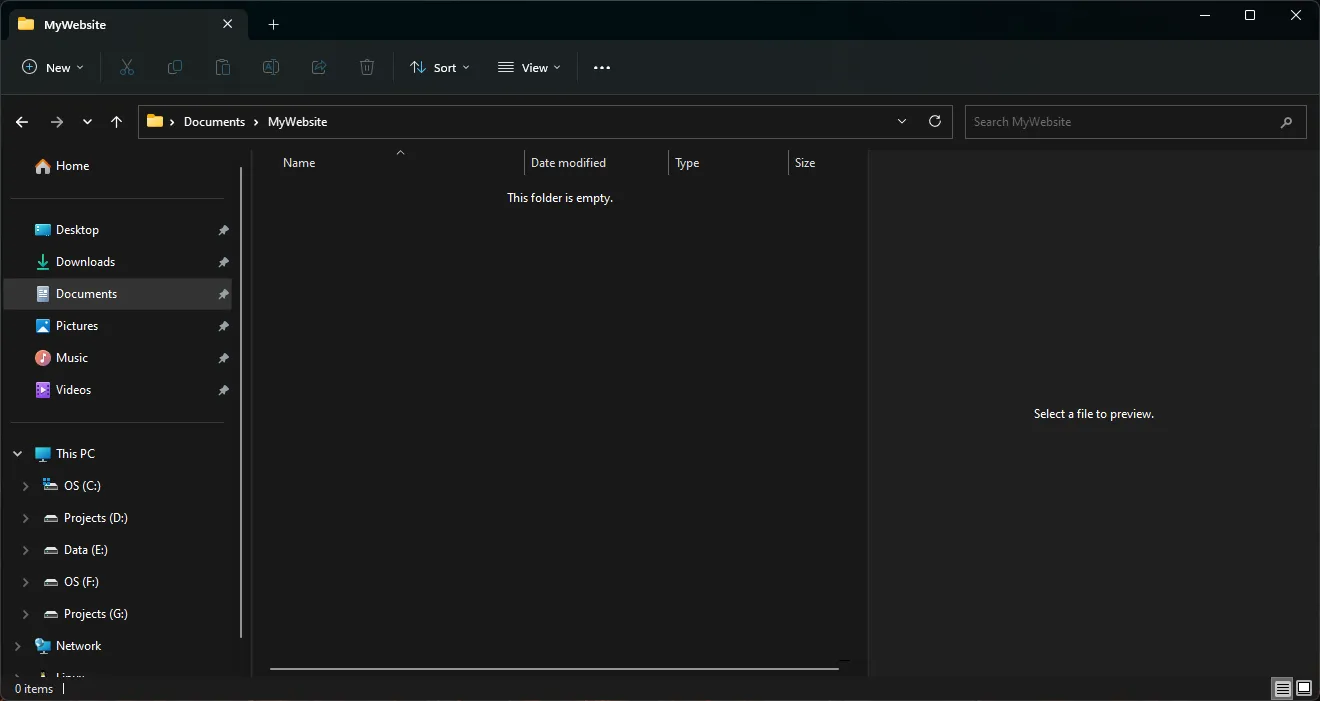
- Create a file named “index.html” inside the “MyWebsite” folder
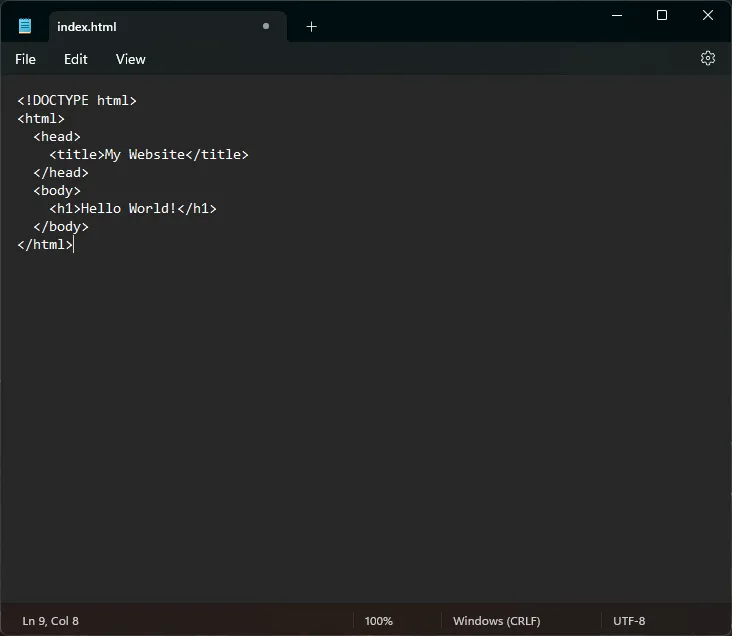
- Open the “index.html” file in your favorite editor and add the below HTML code
<!DOCTYPE html>
<html>
  <head>
    <title>My Website</title>
  </head>
  <body>
    <h1>Hello World!</h1>
  </body>
</html>
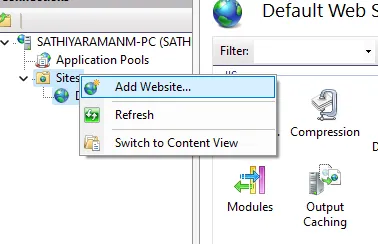
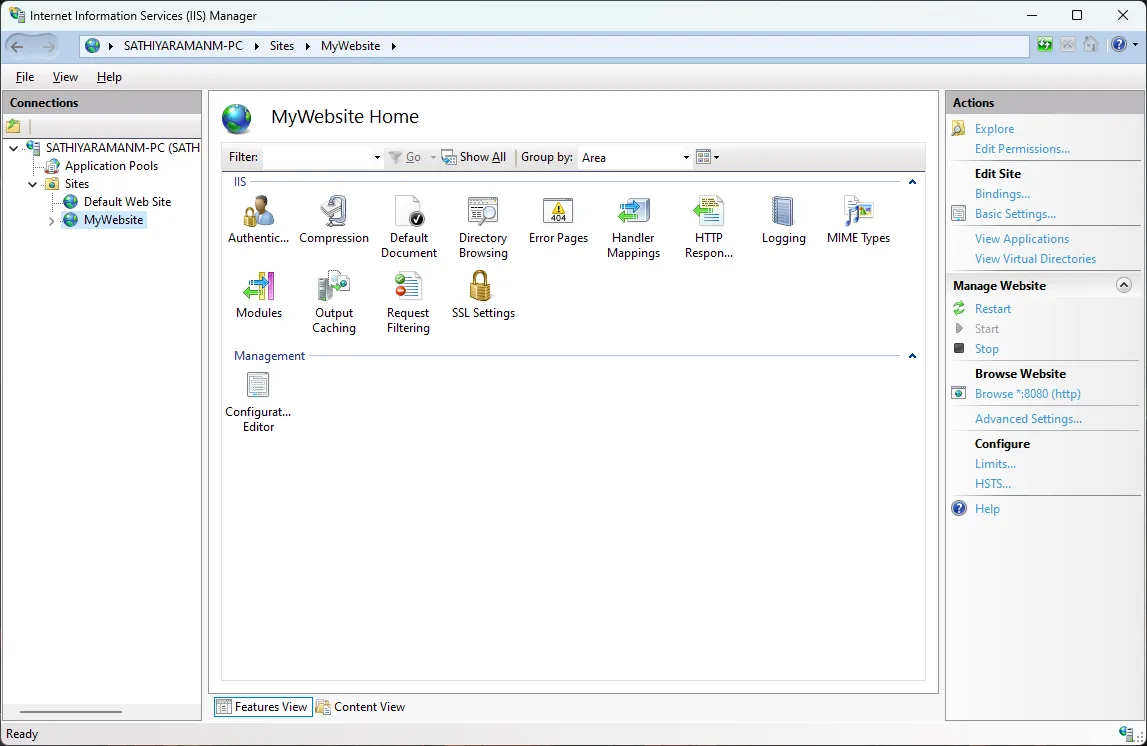
- Open the “IIS Manager” and right click on the “Sites” node. Select “Add Website” from the context menu.
In the “Add Website” dialog, enter the below details
- Site name: MyWebsite
- Physical path: C:\Users\{your-username}\Documents\MyWebsite
- Binding: http, All Unassigned, Port: 8080
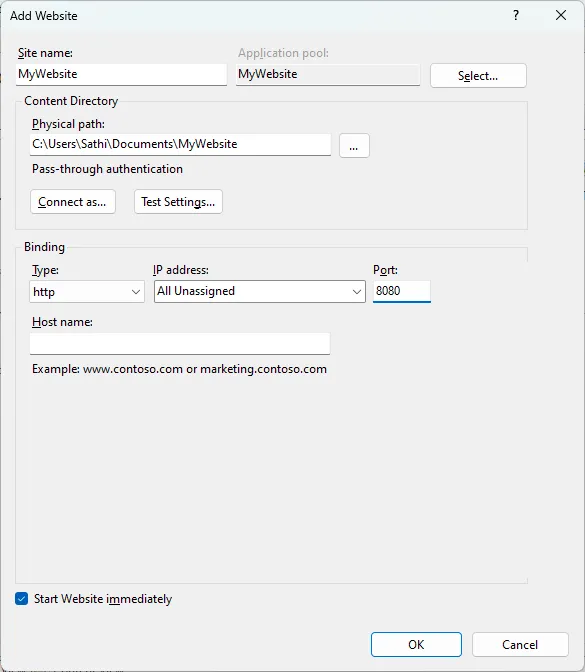
- Click OK and you will see the “MyWebsite” node under the “Sites” node
- Right click on the “MyWebsite” node and select “Browse *:8080 (http)” from the context menu. You are expected to see “Hello World!” message in your browser. But wait, you will see an error message instead!
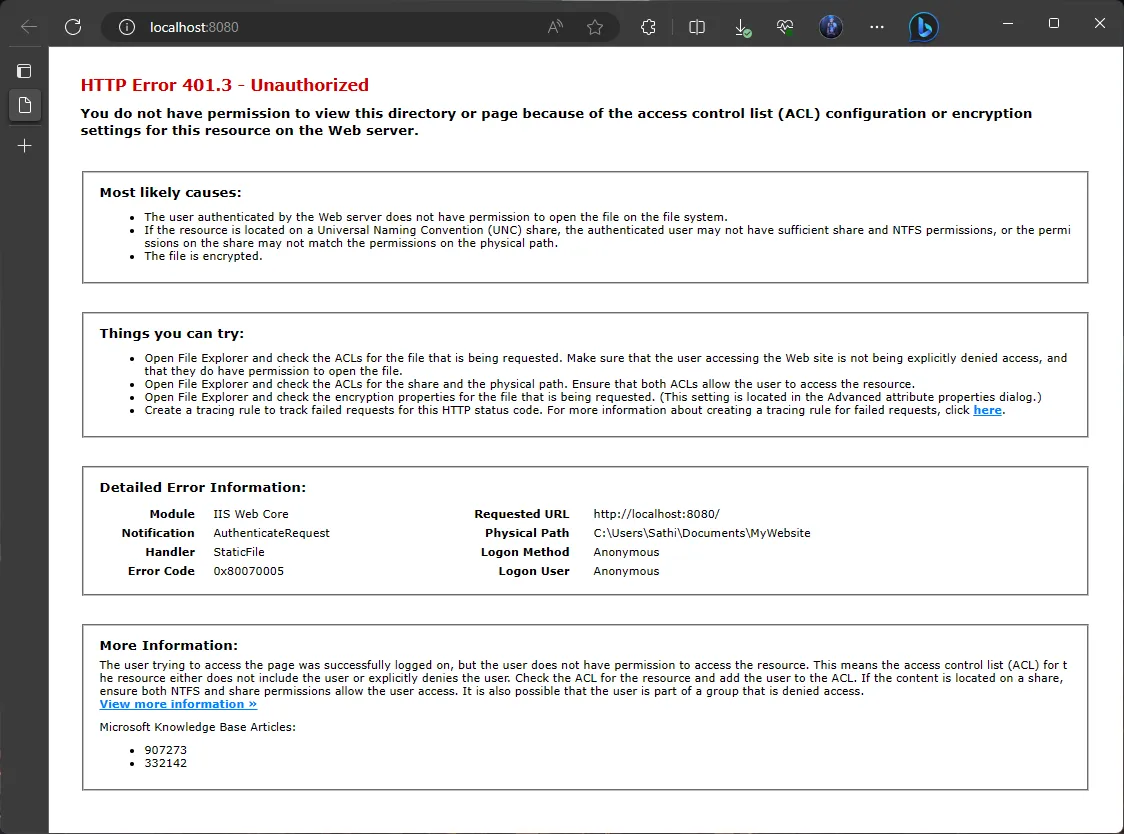
- The reason for the error is that the directory doesn’t have the required permissions to be accessed by IIS.
Fixing the permissions
- To fix that, click on the “MyWebsite” node and click on the “Edit Permissions…” link in the actions pane.
- Go to the “Security” tab and click on the “Edit…” button.
- Click on the “Add…” button and enter “IUSR;IIS_IUSRS” in the text box and click OK.
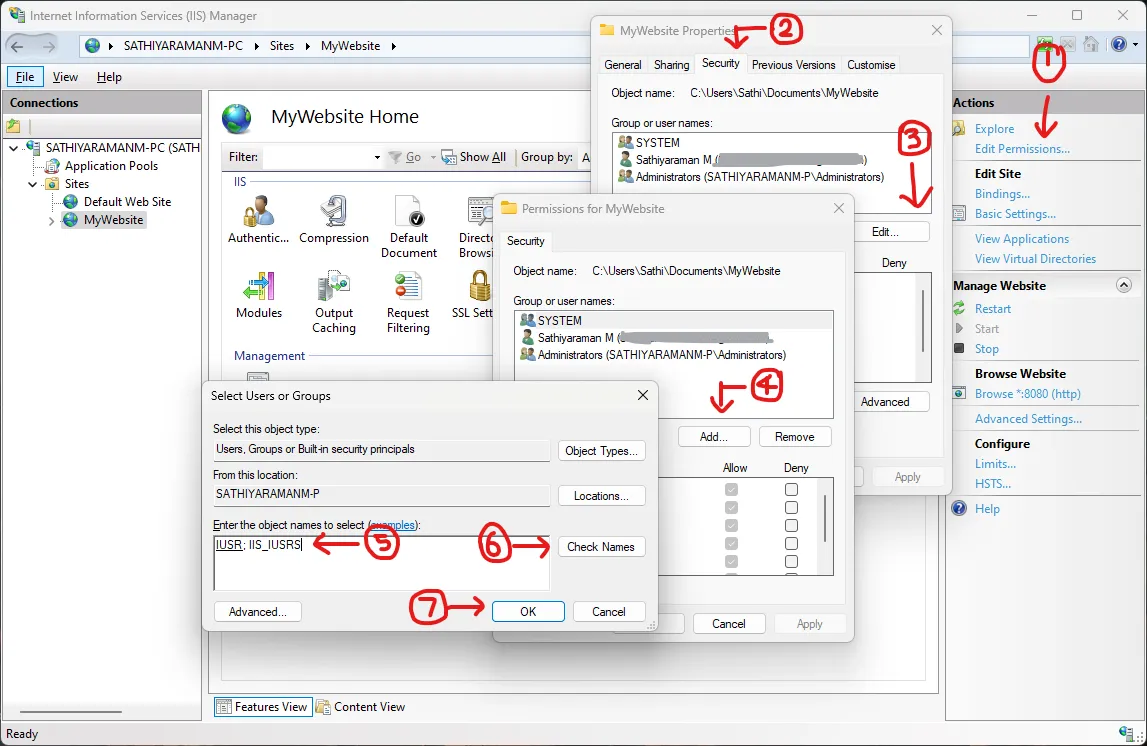
- Select the “IUSR” and “IIS_IUSRS” users and check the “Full control” checkbox and click OK. Click OK again to save permissions and close the “MyWebsite Properties” dialog.

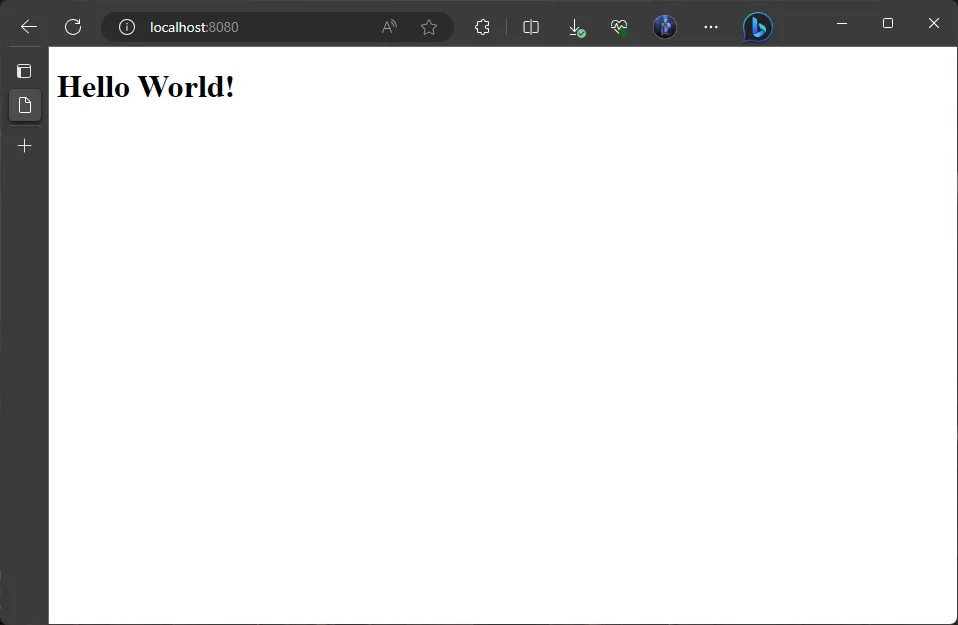
- Now, refresh the browser and you will see the “Hello World!” message.
Some useful tips
The usual best practice is to host the websites in the “C:\inetpub\wwwroot” folder. But, you can host the websites in any folder of your choice like we did in this article.
If you want to change the port number, you can do that by clicking on the “Bindings…” link in the actions pane. You can also add multiple bindings for the same website.
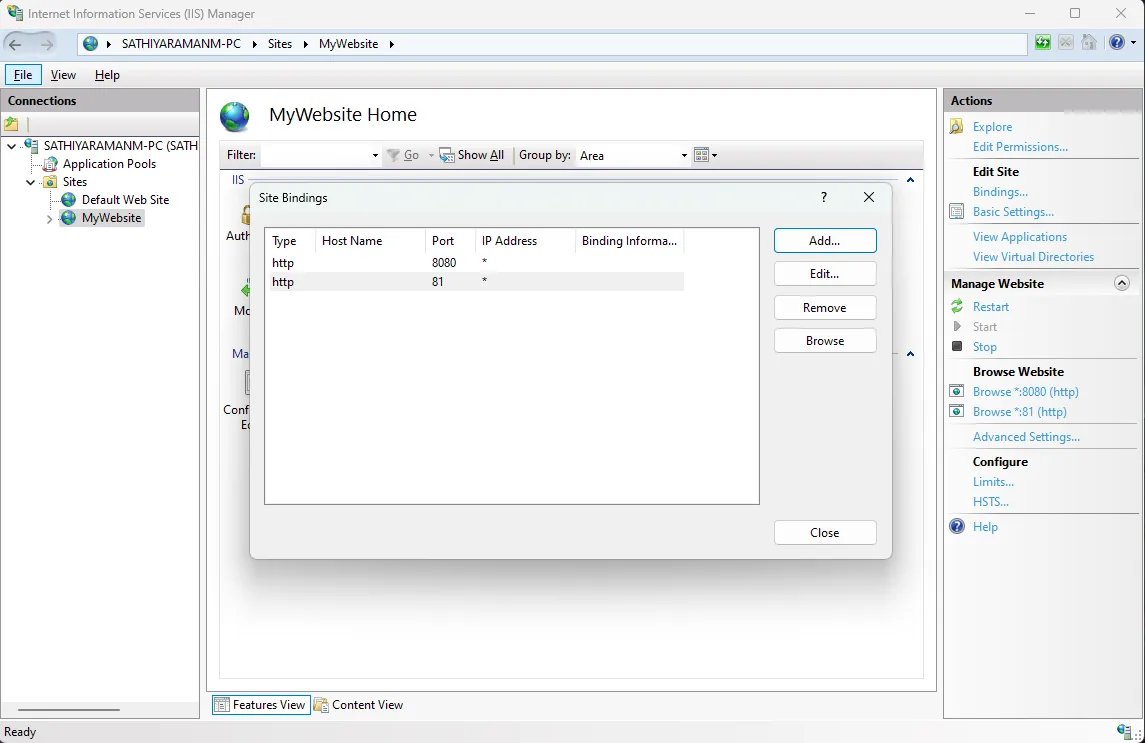 You can also open the site in
 http:\\localhost:81.
- If you want to host multiple websites, you can do that by adding multiple websites in the “Sites” node. You can also host multiple websites in the same port with different host names. For example, you can host two websites in the same port 80 with host names “www.mywebsite1.com” and “www.mywebsite2.com”. You can do that by adding two websites in the “Sites” node with different host names. This is particularly useful when you want to host multiple websites in the same server with different host names or domain names.
Note: It is not straight-forward to test this on your local machine. You need to edit the hosts file of your local machine to test this scenario.
- The steps are almost same in Windows Server machines as well. The only difference is that you need to enable the “Web Server (IIS)” role in the “Server Manager” instead of enabling the “Internet Information Services” feature in the “Turn Windows features on or off” dialog. Once you enabled the “Web Server (IIS)” role, you can follow the same steps to host your website and access it from any other machine in your network.
What if I want to access my website from internet?
If you want to access your website from internet, you need to do the following:
- You need to have a static IP address for your server machine, that is accessible from internet, which you need to get from your ISP (Internet Service Provider). This IP Address can be used to access your machine from internet.
- You need to have a domain name for your website, which you need to get from a domain registrar like GoDaddy, Name.com, etc.
- You need to map your domain name to your static IP address. You can do that by adding an “A” record in your domain registrar’s DNS settings. (Very high-level explanation)
- You need to add a firewall rule to allow incoming connections to the port that you are using to host your website. You can do that by adding an “Inbound Rule” in the “Windows Defender Firewall with Advanced Security” dialog.
This is a very high-level overview of what you need to do to host your website in internet, but I hope you got the idea. I may write a detailed article on this topic in future.
Wrapping up
In this article, we have seen how to host a simple HTML page using IIS. This is a very basic simple walkthrough to get you started with IIS. You could also host various other types of websites like ASP.NET, PHP, etc. using IIS.
Say if you are hosting a client-side application, say Angular, you should map the physical file path of the IIS Website to the dist folder of your Angular application.
Same applies for server-side applications like ASP.NET, PHP, etc. You should map the physical file path of the IIS Website to the output folder of your server-side application.
Once you hosted your website, you can access it from any other machine in your network by using the IP address of your server machine. If you are doing this in your local machine, you can access it from your mobile phone as well, provided that you have added a firewall rule to allow incoming connections to the port that you are using to host your website.
I hope you found this article useful. I would like to write more articles on various other aspects of hosting websites. So, stay tuned!